Welcome: Shenzhen Zhuolida Electronics Co.TD
Language:
 ∷

∷
∷
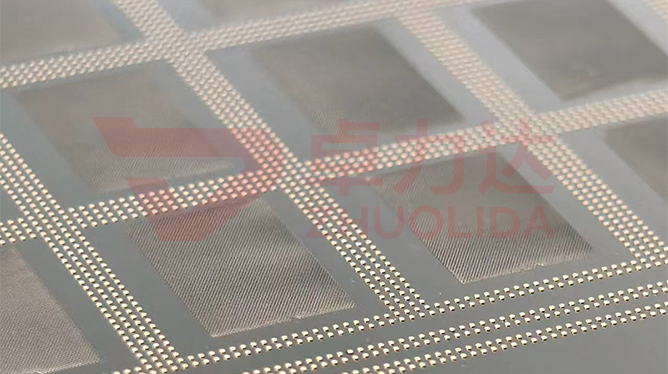
An electroformed aperture plate used to block light has passed ±3 μm aperture checks and 20 μm rib-width checks, yet the image still picks up a grey haze once it is mounted in the barrel. The problem is rarely dimensional; it is the brightness of the nickel surface. Electroformed aperture plate blackening is the matte-finishing step after forming and demolding that pushes down the specular reflection of the ribs and aperture walls, so light landing on the blocking area does not bounce back into the imaging path. These plates cut the field and stop edge rays; with a code track held to 50 μm±0.5 μm and ribs as thin as 20 μm, any reflection sends stray light bouncing around the barrel and contrast collapses. Blackening is not a coat of paint: a thick film clogs micro-holes and shifts openings, a thin one leaves the bright nickel showing through. The line usually runs a nickel-cobalt strike followed by chemical matte treatment, keeping the layer at sub-micron thickness and balancing adhesion against coverage. What the step has to deliver is an opening that still holds ±3 μm, matched reflectance on both faces, and no powder shedding after wiping or annealing.
The common trap on the line is treating blackening as a cosmetic pass. Fit a batch of plates to an inspection lens and the dark field turns milky; strip it down and apertures and rib width are unchanged, but side-lighting reveals bright streaks left on the nickel, stray light riding the rib edges into the field. Switch blackening bath lots and two plates from the same artwork differ in reflectance by a margin, so the instrument has to be recalibrated plate by plate. Worse is adhesion: after low-temperature annealing a light wipe with a lint-free cloth sheds fine black dust from the rib roots, and that dust on a code disc or CMOS sensor is a defect the customer only finds after returning the whole lot. Subtler still, blackening solution seeps into 30 μm micro-holes and shrinks the rim; the automatic stencil checker scanning the flat face misses it until the assembly shows the wrong throughput. None of these show up in a routine ±3 μm aperture re-check, which is why electroformed aperture plate blackening leans harder on process records than dimensional inspection, tracking thickness, adhesion and reflectance bath by bath.
Parameter Window
• Blackening layer: sub-micron, far below the 20 μm rib width, so it consumes no dimensional tolerance
• Reflectance: specular reflection held under 5% after matte treatment, 3% internal target, lot spread ≤1 point
• Aperture retention: micro-hole tolerance ±3 μm, openings measured before and after, shrinkage kept inside the band
• Strike layer: nickel-cobalt alloy, current density 1–4 A/dm² for stress control, low-temperature anneal before blackening
• Two-face match: LDI double-side alignment ±5 μm, reflectance difference between faces held within 1 point
• Adhesion check: no peeling or dust after tape peel and lint-free wiping, RoHS papers filed per lot
Manufacturing Process (8 Steps)
1. Artwork preparation — master data from the aperture pattern, blackening requirements flagged for 20 μm ribs and code-track zones.
2. Pre-treatment — substrate cleaning and conductive coating, mandrel passivated to keep strike nodules off the ribs.
3. Lamination and LDI — imported LDI exposure at 8 μm/8 μm resolution and ±5 μm double-side alignment; rib sidewall verticality is set here.
4. Development — control concentration and time so no residue stays at the foot and the sidewall is not undercut; a clean rim resists blackening seepage.
5. Electroforming — staged nickel-cobalt control of current density at 1–4 A/dm² and bath temperature, suppressing internal stress and coarse grain.
6. Demolding and annealing — one-piece release from a low-stress corner, then annealing to relieve stress so thin ribs do not warp during blackening.
7. Surface blackening — chemical or electrochemical matte treatment, bath concentration, temperature and time controlled, two faces done separately at sub-micron thickness.
8. Inspection and packing — vision and flash measurement re-check ±3 μm apertures and position, reflectance and adhesion sampled, RoHS papers filed.
Core Advantages
1. Stray light held down — hold electroformed aperture plate blackening at ≤5% reflectance and dark-field haze and edge glow shrink sharply.
2. Dimensions intact — sub-micron layer, openings measured before and after, ±3 μm tolerance not eaten away.
3. Strong adhesion — nickel-cobalt strike plus low-temperature annealing, no dust under tape peel or wiping, no code-disc contamination at assembly.
4. Two faces matched — separate matte passes and per-plate sampling keep lot reflectance spread within 1 point, so the instrument needs no plate-by-plate calibration.
5. Micro-holes stay open — development controls undercut, blackening controls seepage, 30 μm openings keep steady throughput.
6. Traceable — bath concentration, temperature, layer thickness and sampled reflectance logged per run, faults traced back to a bath lot.
Typical Applications
1. Aperture and field stops in machine-vision inspection lenses, where dark-field contrast is most sensitive to reflection.
2. Encoder code-disc shutter plates, code track 50 μm±0.5 μm, matte ribs avoiding misreads.
3. Aperture and field-stop assemblies in optical metrology instruments, where the stray-light budget is tight.
4. Light-blocking plates in semiconductor exposure and alignment modules, where thin ribs cannot shed dust.
5. Matte spacer rings in medical endoscopes and microscopy, where cavity multi-reflection must be suppressed.
6. Shading meshes with micro-hole arrays, where ±3 μm opening tolerance and matte finish must both hold.
Design and Selection Notes
1. Fix the matte route first. Paint is hard to control in thickness and clogs micro-holes; sub-micron chemical treatment suits 20 μm ribs better.
2. Do not skip the strike. Nickel-cobalt with current density 1–4 A/dm²; uneven stress peels after blackening.
3. Leave margin in development. A few tenths of a micron of undercut plus blackening seepage shrinks the rim again.
4. Anneal before blackening. Relieve stress first and the thin ribs stay flat, the layer stays even.
5. Give reflectance its own station. A flat-bed checker cannot read specular reflection, so sample per bath with a reflectometer.
6. Verify adhesion per lot. Tape peel is only a floor; simulate the wiping the assembly actually does.
7. Where RoHS is specified, file bath and strike-layer compliance papers with the lot rather than scrambling at shipment.
Seen on its own, electroformed aperture plate blackening barely occupies a standalone step: LDI and development shape the rib sidewall, the electroforming bath and annealing set the nickel-cobalt stress, and the few minutes of matte treatment decide whether reflectance and adhesion can both be delivered. Pre-treatment, exposure, deposition, stripping and blackening each own a stretch, and let any one slip and the 5% reflectance line will not hold, dust follows. What is genuinely hard on a line is not turning out one dark, durable sample now and then, but keeping a dozen plates from one bath and several consecutive lots inside the same reflectance, thickness and aperture band — only then does ±3 μm aperture accuracy mean anything. For orders with a hard requirement on dark-field contrast, fix bath concentration, temperature, blackening time and the anneal curve into the process card at sampling stage and run to that card in production; it is far cheaper than calibrating plate by plate and wiping lenses after assembly. On paper electroformed aperture plate blackening is a string of parameters; on the line it is the simple fact that every plate blocks stray light in the same matte state.
Contact:赖先生
Phone:+86 18938693450
Tel:0755-2708-8292
Email:yw9@zldsmt.com
Add:深圳市宝安区福永镇新和村福园一路华发工业园A3栋
 Zhuolida